

Let’s review the steps I’ve worked out so far and add some I haven’t in order to get an overview of how things are coming together.
- Deskew the image
- Doing this first means the main elements are all in broadly the same locations
- OCR.
- I’m not sure about this yet, but it might be better to do it before the rest of the processing
- Fill the main red and white areas with solid colours
- Currently done in Paint 3D, but could this be done some other way?
- The tolerance setting seems to be critical here.
- Use Magic Select in Paint 3D to select the label from the background vinyl.
- Crop the label and resize it to a standard square canvas.
- Replace the main red and white areas with solid fill
- Posterize to red, white and black only.
Contents
1 – Deskew
Although all the photos will be orientated the same way (up? round?) they all need to be straightened out. The basic approach is to use the text in an image to find the correct skew and then deskew it. Typically, this is based in OCR, where a page of text full of lines can be easily identified and used to find the angle of each line.
There is a library for Python called Deskew that finds the angle.The rotation is then achieved with a couple of OpenCV functions.
https://www.geeksforgeeks.org/python-opencv-getrotationmatrix2d-function/
2 or ?- OCR
Although the deskew is based on OCR it doesn’t actually return the text. I’ve previously extracted label info quite successfully using Power Automate. I can also use Tesseract in Python.
https://www.geeksforgeeks.org/reading-text-from-the-image-using-tesseract/
Once the text is read – however that is achieved – various checks can be done comparing the info I have already created ready for the database. There are front and back sides to match up too. In the end, I can’t rule out errors here, but I hope I can detect mismatches on catalogue/library and matrix numbers and flag up those files which need attention.
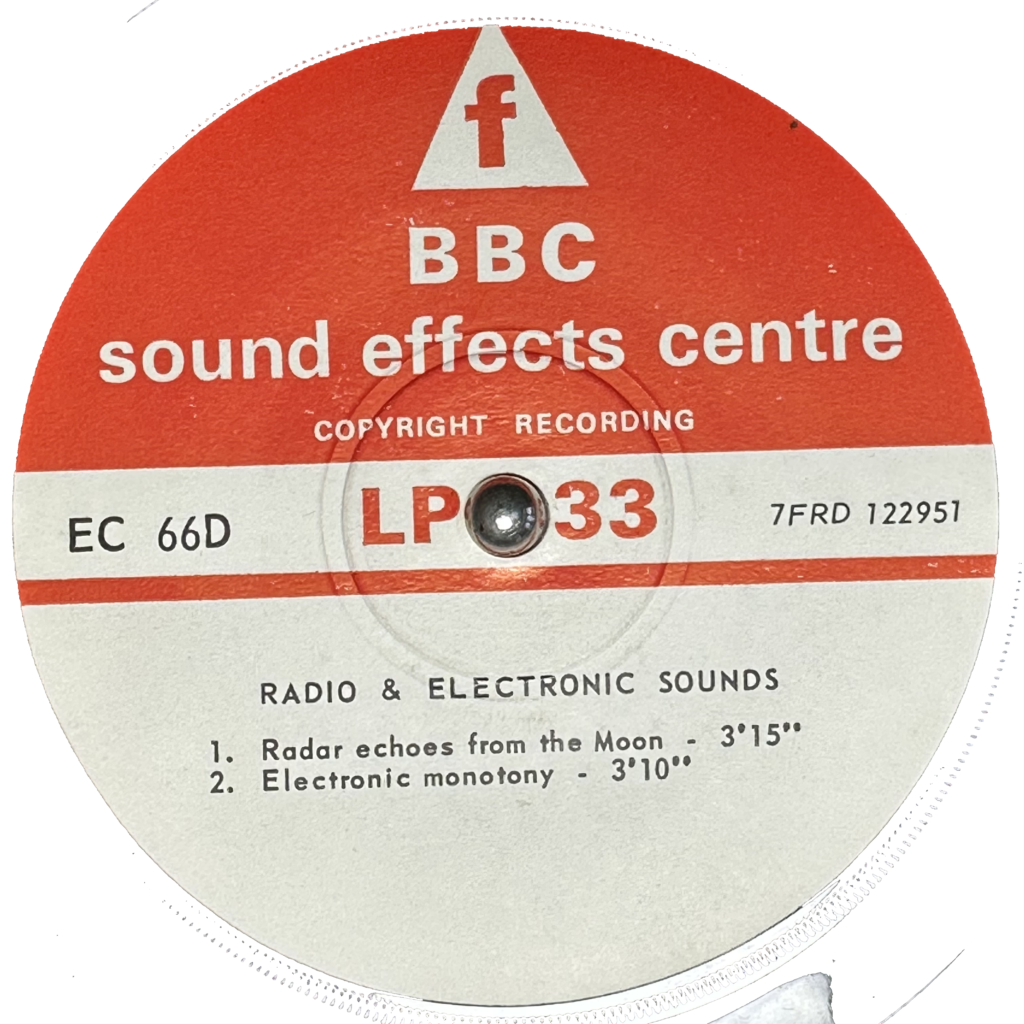
I may move this to the end of the process as that will make locating the various areas of the label easier. The plan is to avoid reading the un-needed parts of the label – ‘BBC Sound Effects Centre’, ‘Copyright Record’ and ‘LP 33’ – and also avoid the issues which OCR will have trying to find lines of text.
3 & 6 – floodFill
The bucket tool in Paint 3D has a tolerance setting which I hadn’t paid attention to before now. This would appear to be critical to the success of filling only the label. One issue I had with the Bucket tool was that after using it followed by Magic Select I was struggling to select the background, in order to delete it.
Happily, there is a tool in Python-Pillow with a similar tolerance setting.
https://www.geeksforgeeks.org/floodfill-image-using-python-pillow/
Another take on this is that instead of filling the foreground label the background can be filled instead. Here I’ve filled the black background of the vinyl with pure white. the tolerance has to be between 31% and 38%. Too low and the indented serrations show up too much, although that might be irrelevant. Too high and the label is flooded too.
This inversion of what I did in the previous post has a distinct advantage over the foreground fill because locating the background requires no thought at all – top-left corner will probably work fine.
4 – Magic Select the label
Magic Select in Paint 3D still seems to be the best way to do this. I do wonder if I’m missing something in Pythonland though. Perhaps with some combo of floodFill and posterizing I can lift the label out without recourse to a Window application. Keeping everything scripted would be easier overall. Perhaps I can get a better contour now?
5 – Crop and Resize.
I found out how to crop the image in the second post, but I wasn’t getting good results with GrabCut or other methods of identifying the circular label. Later I found the boundingRect function which relies on finding contours. I glanced at that that before but lacked a way to extract the main contour. Now, this should be easy.
https://www.geeksforgeeks.org/finding-minimum-enclosing-rectangle-in-opencv-python/
7 Python Posterize
Although I’ve used GIMP to play around with image processing I would prefer to do everything in Python. Hence this method for posterising the image is what I need.
https://www.geeksforgeeks.org/python-pil-imageops-postarize-method/
Conclusion
Although I don’t have a set order for these steps and I’m still working on the best way to do each one, the puzzle is starting to take shape.